Content
- 1 What Calibrachoa seeds look like
- 2 How to harvest calibrachoa seeds
- 3 When to sow calibrachoa for seedlings
- 4 How to plant calibrachoa from seeds
- 5 How many days do Calibrachoa seeds germinate?
- 6 Why Calibrachoa Seeds Don't Sprout
- 7 How to grow calibrachoa from seeds
- 8 Pinching calibrachoa
- 9 Transplanting calibrachoa seedlings to a permanent place
- 10 Conclusion
- 11 Reviews of calibrachoa from seeds
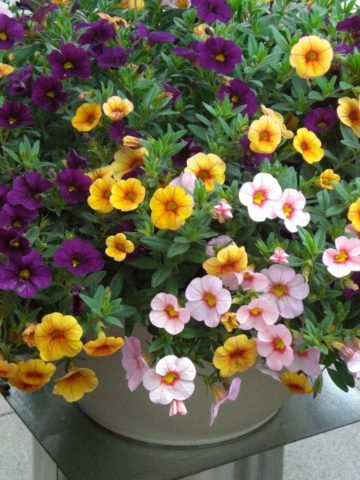
Growing calibrachoa from seeds is an exciting experience. This plant was considered a type of petunia. But since 1990, due to the difference in DNA, they have been allocated to a special group. Today, gardeners can purchase varietal plants with different colors of petals.
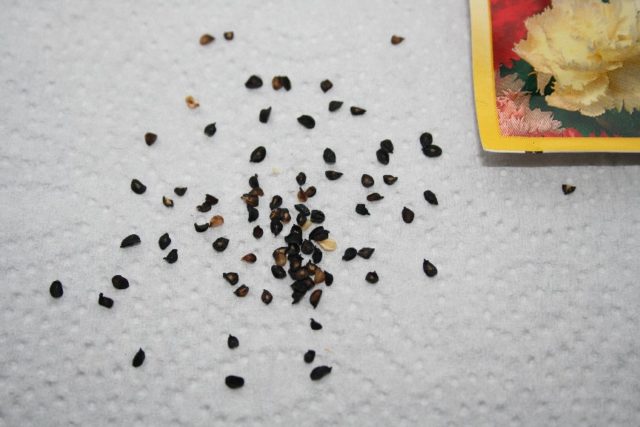
What Calibrachoa seeds look like
Growing a flower has its own characteristics. Calibrachoa seeds are very small, round, slightly larger than those of petunia. In addition, they are distinguished by low germination. This fact should be taken into account when sowing, to make seeds into the soil very densely.
Better yet, for growing high-quality seedlings, purchase granular seed, as this will facilitate the work.
How to harvest calibrachoa seeds
If there is at least one calibrachoa bush on the site, then the seeds can be collected on their own. They ripen in small boxes. It should be borne in mind that the boxes are cracked. Therefore, you need to collect them without waiting for disclosure. It is better to put the collected seed material for further flower cultivation in a high jar and put it in the sun so that the seeds do not scatter around the apartment.
When to sow calibrachoa for seedlings
To grow lush bushes of an amazingly beautiful flower, you need to decide on the timing of planting calibrachoa seeds for seedlings. The best dates are late February or early March. Before planting in the ground, the seedlings will have time to grow. And this is the key to successful cultivation of calibrachoa in a flower bed.
How to plant calibrachoa from seeds
As already noted, the germination rate of calibrachoa seeds is low. Growing a plant by seedling method involves preparing the soil, containers for sowing seeds.
Preparation of planting tanks and soil
You can sow seeds in a common seedling box, if picking is supposed, or in separate pots, peat tablets. But due to the low germination rate, you will have to lay several seeds in one container, then leave one plant.
As for the soil for growing calibrachoa, you can buy a ready-made composition in the store. You need to choose a soil designed for growing seedlings and flowers. But many growers prefer to prepare the soil on their own. It should be borne in mind that plants respond well to loose, breathable soil. Therefore, peat, perlite or vermiculite are added to the garden soil.
The composition of the soil for growing seedlings:
- garden land;
- peat;
- compost;
- sand.
The proportion is 2: 1: 1: 0.5.
To improve fertility, you can add superphosphate or phosphorus-potassium fertilizers.
If the seeds are sown in boxes for growing on the balcony, that is, immediately to a permanent place, then picking is not expected.A drainage layer of at least 4 cm is laid out on the bottom of the box. These can be small stones, pieces of red brick (not silicate). And already a layer of fertile soil is poured onto the drainage.
Before sowing, any soil (store-bought or compiled independently) must be disinfected with hot water with several crystals of potassium permanganate. Boric acid or hydrogen peroxide can be used for the same procedure.
Seed preparation
When growing calibrachoa from seeds (the sizes of which are visible in the photo), it is not always possible to obtain a sufficient number of seedlings due to the fact that only one third of the seed emerges. To increase germination, protect against diseases and pests, experienced flower growers advise soaking in a pink solution of potassium permanganate, in "Zircon" or "Epin".
After 24 hours, the seeds intended for growing seedlings are washed with clean water and dried on a napkin. All that remains is to infuse them into the prepared soil.
Sowing rules for calibrachoa seedlings
Calibrachoa seeds are sown in a well-moistened soil very densely, since the germination rate is low. On a 10x10 cm square, at least 80 seeds must be sown. It is better to scatter the seeds over the surface, and then sprinkle with a small layer of soil, but not higher than 0.5 cm.
After that, containers with seeds are placed for growing seedlings on a well-lit window in a room where the temperature is at least 18-20 degrees. To retain moisture and accelerate seed germination, the containers are covered with glass or a transparent plastic bag.
A greenhouse effect is created under the shelter, which means that water droplets, settling, moisten the soil. During the cultivation of seedlings, so that the surface does not become moldy, the film or glass must be lifted several times. And wipe the resulting dew.
If the soil is dry before germination, then it is sprayed with a spray bottle. It is not recommended to use chlorinated tap water for irrigation. If there is no other liquid, then the water is poured into the container in advance and allowed to settle for at least 12 hours.
The glass and film cover is removed when green blotches appear on the surface of the container.
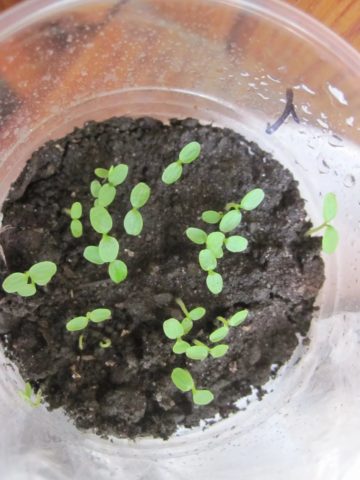
How many days do Calibrachoa seeds germinate?
Although the seeds are small, seedlings do not appear soon. Typically, small green blotches can be seen after 14-16 days. Unfortunately, not all seeds germinate.
Why Calibrachoa Seeds Don't Sprout
Calibrachoa seeds are expensive, and not all hatch. This, of course, is insulting. You need to understand what is the reason:
- Sowing too deep. Small seeds simply stall, the sprout cannot break through the thickness of the earth.
- Drying out of the soil after sowing.
- Too damp soil, which causes the seed to rot before hatching.
How to grow calibrachoa from seeds
When growing a calibrachoa flower at home from seeds, you must follow the rules for sowing and caring for seedlings. To do this, you need to know the features of agricultural technology, caring for seedlings indoors and outdoors.
Optimal conditions for growing seedlings of calibrachoa from seeds
Calibrachoa is a light-demanding plant. Immediately after germination, the seedlings need to be illuminated for about 16 hours. Natural conditions will not allow observing this parameter, therefore, during the cultivation of high-quality seedlings, you will have to take care of installing additional lamps.
When 4-6 true leaves appear on the plant, the duration of illumination can be reduced to 12 hours. The air temperature throughout the entire stage of growing seedlings from the moment of germination is 18-20 degrees.
Watering and feeding
Seedlings of calibrachoa grown from seeds are demanding for watering, but it is not recommended to fill the soil in a nursery or open field.Stagnant water can cause root diseases such as black leg, from which calibrachoa can die. Watering is necessary only when the topsoil dries up.
In the heat, the bushes need to be sprayed. Growing seedlings involves irrigating it from a spray bottle. Sprinkler irrigation is used to spray flowering calibrachoa, but the nozzle should be very shallow. The thing is that the bells are delicate, fragile, and easily damaged.
Calibrachoa is watered only at the root, while fertilizing is applied. Only in this case can you get bushy plants with lush flower caps.
Until the buds are formed, calibrachoa is fed 3-4 times a month. Fertilizers must contain nitrogen in order to build up green mass. When the buds are tied, fertilizers containing potassium and phosphorus are selected for feeding.
Suitable for feeding indoor or balcony calibrachoa:
- Floron;
- "Nutrivant universal";
- "Polygro";
- complex fertilizers for flowers.
Calibrachoa is an ampelous plant. But lush bushes with an abundance of green mass are valuable. To improve tillering, seedlings are fed "Athlete". Only 3 procedures with a frequency of 14 days will prevent over-stretching of the stems. The internodes will become shorter, which means that the buds will be denser.
When using any chemicals for feeding Calibrachoa, you must strictly follow the instructions, since a large concentration of substances can be harmful. If the plants grown from seeds do not die, then their development will slow down, flowering will be postponed indefinitely.
Picking
Growing seedlings in a common container involves picking. This work is planned when 2-3 true leaves are formed on the plant, that is, in a month from the moment of germination.
The composition of the soil should be identical to that used for growing seedlings. The soil is also prepared: spilled with boiling water, it is possible with potassium permanganate.
As for the containers, a 200 ml glass will be enough for the first transplant of calibrachoa seedlings. During the subsequent transshipment, a pot is taken, the diameter of which is at least 15 cm. The bottom of the pot is drilled to exclude stagnation of water. For the same purpose, drainage is used, which should be at least 4 cm.
In the center of the container, a recess is made in which only one seedling is placed. The root is covered with earth, the soil is squeezed with fingers, then it is watered abundantly to squeeze out the voids.
Care of calibrachoa seedlings after picking
Further care for calibrachoa grown from seeds after picking comes down to traditional activities:
- watering and feeding;
- loosening and weeding;
- pinching.
In addition, to make the bushes decorative, it is necessary to promptly remove faded inflorescences. Such a procedure will not only increase the flowering of calibrachoa, but will also allow the collection of seeds. This is essential when growing lush bushes.
Pinching calibrachoa
Powerful cascading bushes of an ampelous plant can only be formed if the stems are pinched.
Do I need to pinch calibrachoa
After the procedure, lateral shoots begin to form in the internodes. The result is a voluminous and lush bush.
Cut off shoots do not need to be thrown away. Cuttings root perfectly. This will allow you to get a large number of new shrubs to decorate your garden, porch or terrace.
When to pinch calibrachoa
You need to pinch the calibrachoa while the seedlings grown from the seeds are still small.It is at this time that the first buds appear, which will slow down the growth of the plant, and, therefore, a lush bush will not form.
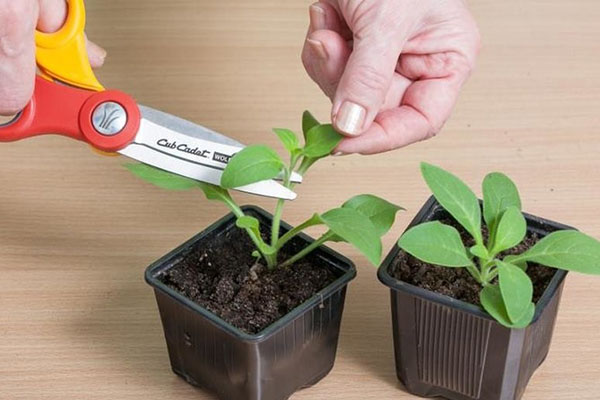
How to pinch calibrachoa correctly
As soon as the length of the stems reaches 6-8 cm, they are pinched 2/3 of the length. The operation is repeated when it reaches 15 cm. Further actions depend on the preferences of the grower. If you need bushes with hanging shoots, then some of them are not pinched again.
Transplanting calibrachoa seedlings to a permanent place
Planting seedlings of calibrachoa in open ground (pots or flower beds) is performed after a stable positive average daily temperature is established.
It is advisable to grow ornamental shrubs in a place filled with light. Even a little shading contributes to uneven growth of the stems, from which the aesthetics of the plant are lost. In addition, there is a risk of not blooming. The south side of the site fits perfectly.
It is necessary to protect the calibrachoa from drafts and sharp gusts of wind. After all, the stems of the plant are very delicate and fragile. And the opened buds do not like showers, they lose their decorative effect, the edges on the petals break off.
That is why experienced florists recommend growing bushes in closed or semi-enclosed spaces. These can be balconies, loggias, verandas or terraces.
When grown indoors, especially if they face north, backlighting is necessary even in summer.
Before planting, you need to carefully prepare the site. The soil must be fertile and nutritious. To prevent the disease of the root system from the black leg, the seat must be spilled with boiling water with several crystals of potassium permanganate.
If the plants are grown in containers, pots and pots, then you can use ready-made soil, which is sold in specialized stores.
Water calibrachoa outdoors or in pots sparingly as the soil dries. Water only at the root, not over the leaves, 1-2 times a week. Spraying will be required during dry periods.
Conclusion
Growing calibrachoa from seeds is only gaining popularity among Russian flower growers. Therefore, they have a lot of questions. Florists are interested in the timing of sowing seeds for seedlings, the rules of agricultural technology and the peculiarities of care for obtaining an ornamental bush.


