Content
At the end of winter, the plans of many flower growers include growing salpiglossis from seeds at home so that by mid-May the seedlings of this unusual elegant flower can be planted in open ground. Bright, colorful gramophone with a graceful pattern of mother-of-pearl veins, as if drawn by a thin brush on the inner surface of the petals, invariably delight and fascinate.
It is not surprising that everyone who happened to see salpiglossis during its flowering period certainly wants to "invite" this miracle to his own garden. This is not so difficult to do, because this plant reproduces by seeds. If the climate permits, you can wait until the end of spring and plant them right in the open air. However, it's best to put in a little effort and take care of growing the seedlings. Troubles will pay off: in this case, the flowering of salpiglossis will come earlier and will be longer.
Description of salpiglossis seeds + photo
The seeds of this plant ripen in autumn. After the end of flowering, in place of the wilted heads of salpiglossis, fruits are formed in the form of oval-shaped bolls with two branches. Each of them contains up to 6,000 small dark-colored seeds.
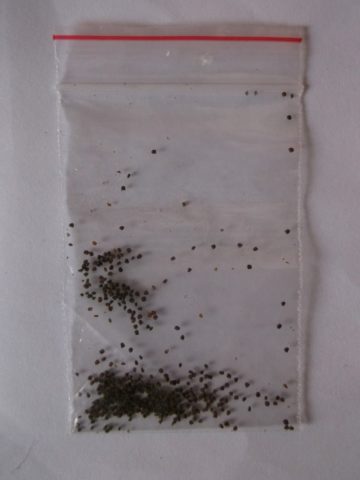
Each fruit - a box of salpiglossis contains a large number of small dark seeds, which, if stored correctly, germinate well within 4-5 years
As a rule, if the grower wants to get the seed of a particular variety of salpiglossis from his site, he removes most of the wilted buds, leaving only a few of the largest inflorescences. From them later he will collect seeds.
If you do not do this, simply leaving all the boxes on the bush, then under favorable conditions the plant can multiply by self-seeding. It is likely that, once on the surface of the soil, some of the seeds will successfully overwinter and germinate for the next season.
The nuances of growing seedlings
Growing salpiglossis from seeds at home requires knowledge of some of the features that may come in handy.
In particular, you should keep in mind such important nuances:
- Sowing salpiglossis directly into open ground is only possible in southern regions with a warm and mild climate. This should be done before winter or spring (late April or early May). In the middle climatic zone, it is more expedient to sow salpiglossis for seedlings at the end of winter, in order to transfer already grown and strengthened plants to the site in the spring.
- This flower is very sensitive to transplants. This should be taken into account in the process of caring for seedlings. The picking of seedlings is carried out early in order to injure the vulnerable roots as little as possible. The transfer of plants to a flower bed or garden bed is carried out carefully, they are immediately identified in a permanent place and planted together with a lump of earth.
- The flowering of salpiglossis cultivated by the seedling method begins earlier and lasts longer than in specimens sown directly in open ground.
- The seeds of this plant do not need stratification, soaking or any other pre-planting preparation. High resistance to the action of fungi and pathogenic microorganisms is inherent in them by nature.
Sowing rules for salpiglossis seedlings
To cultivate salpiglossis from seeds for seedlings follows the rules. By providing a supportive environment and organizing care according to the plant's preferences, you can easily get strong and healthy seedlings for your own plot.
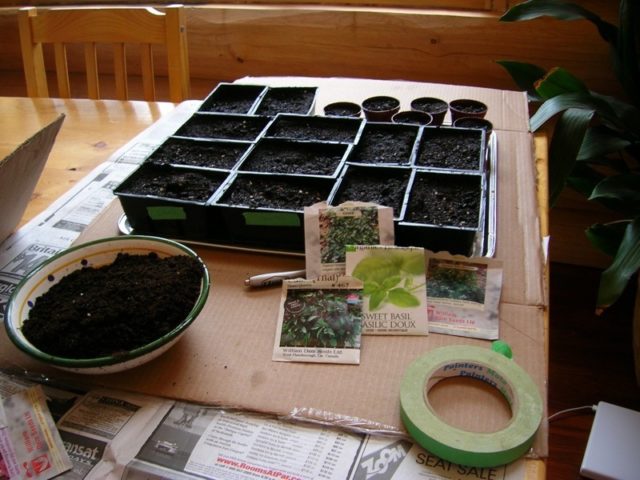
It is possible to sow salpiglossis on seedlings both in individual cups and in wide containers filled with a light, nutritious, non-acidic substrate
When to sow salpiglossis for seedlings
The timing of planting salpiglossis seeds directly depends on the expected time of transfer of plants to open ground. Since the seedlings of this flower are usually rooted in a permanent place in the garden in mid-May, it is necessary to sow it for seedlings no later than late March or early April.
The choice of capacity and preparation of the soil
A suitable container for germinating salpiglossis seeds can be a wide shallow container, small pots or cups, peat tablets.
A suitable potting mix is available at the store and it is important that it is loose, light and nutritious. However, it will not be difficult to prepare the substrate yourself. To do this, you need to mix the following components:
- sod land (4 parts);
- fine river sand (2 parts);
- wood ash (1 part).
Before sowing seeds, the soil should be disinfected by choosing one of two methods:
- warm up in a water bath for 1 hour;
- bake in the oven for 40-60 minutes.
If the seeds were planted in individual containers, they will not need a pick.
Sowing salpiglossis seeds for seedlings
The procedure for planting salpiglossis seeds for seedlings is as follows:
- A drainage layer (small pebbles, expanded clay, foam crumbs) is placed in the prepared containers. Fill the top with a substrate and moisten it from a spray bottle with warm settled water.
- If one wide container is selected, then the seed is evenly distributed over the soil surface with a toothpick soaked in water. In the case where individual cups or small pots are prepared, 2 to 5 seeds are placed in each of them. They cannot be deepened; they should only be lightly pressed to the surface of the earth.
- At the end of sowing, the soil is sprayed with warm water again.
- If the containers are individual, for convenience they are put together on a wide tray or pallet.
- Cover the salpiglossis crops from above with a film or glass and place them in a warm (+ 20-22 ° C) place with moderate lighting.
Practical recommendations on how to properly sow salpiglossis for seedlings and how to care for it at the initial stage contains a video:
How to grow salpiglossis from seeds
From the moment of planting the seeds to the organization of the transfer of plants to the beds, the key role in obtaining healthy seedlings of salpiglossis belongs to the care of them. It is not difficult, but it should be organized correctly.
Microclimate
At the initial stage, the seedlings of the plant need a moderate amount of ambient light. Direct sunlight damages salpiglossis.After 10-15 days, after the emergence of seedlings, additional illumination with a phytolamp is organized for the seedlings, extending their day to 12-14 hours a day.
It is advisable to keep the temperature in the room at 20 ° C heat.
Watering and feeding schedule
Watering salpiglossis seedlings should be moderate. It is advisable to carry out it with settled water at room temperature, spraying moisture over the surface of the soil with a spray bottle. It is necessary to ensure that the ground in the "greenhouse" does not dry out, and promptly remove condensation drops formed on the inside of the glass or covering film.
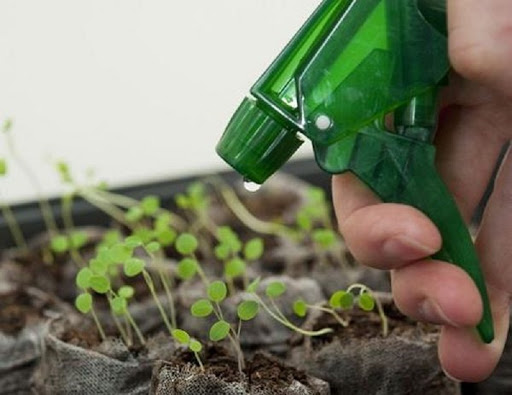
Watering seedlings at first is most convenient from a spray bottle
At the stage of growing seedlings, it is not required to fertilize salpiglossis. In the future, after planting in the ground, it is advisable to feed it a couple of times a month with a complex mineral composition for flowering plants. Ash can be used as an organic additive.
Picking
The picking of salpiglossis seedlings according to individual containers is performed early - at the stage of the formation of their first pair of true leaves. It should be noted that the roots of young plants are very delicate and fragile, so the procedure should be carried out very carefully, digging up and transferring each sprout into a glass or pot along with a lump of earth. A successfully completed pick contributes to the strengthening and further development of seedlings.
As a rule, after that, a support is installed for each of the small plants so that the stalk that grows leaves does not break under its own weight.
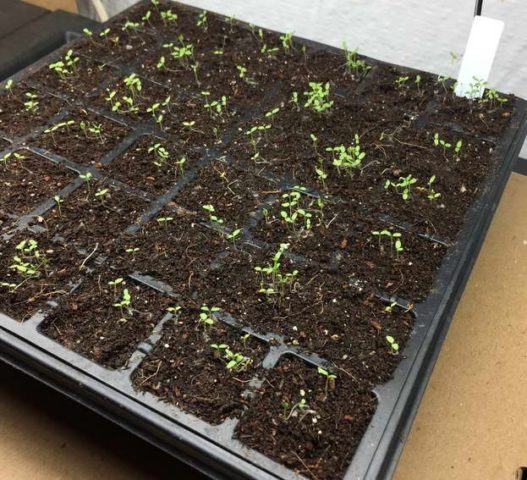
The picking of salpiglossis seedlings is performed early - at the stage of the formation of their first pair of leaves
Pinching and hardening
An important stage in the formation of a beautiful bush in the future is the pinching of salpiglossis. They begin to perform it already at the seedling stage, when the length of the shoots reaches about 10 cm. The tops of the seedlings should be gently broken. Before transferring plants to open ground, it is advisable to repeat this procedure 2-3 times, and then carry out on a regular basis, at the same time getting rid of faded heads and wilted shoots.
Before planting seed-grown salpiglossis in a permanent place outdoors, it must be hardened. This is done gradually. In the first couple of weeks after sowing, the "greenhouse" is removed for 10-15 minutes a day, aerating the seedlings and removing condensed moisture. After the seeds of salpiglossis germinate, the time spent in the fresh air is gradually increased, and then the shelter is completely removed.
Transfer to the ground
Seedlings are transplanted into open ground in mid-May, after the threat of recurrent frosts has finally passed. Young plants are planted in a prepared area at a distance of 25-30 cm from each other, transferring them to the holes along with a lump of earth on the roots. Then the bushes are watered, the stem supports are installed and the soil is mulched with compost from grass.
Conclusion
Growing salpiglossis from seeds at home is not as difficult as it might seem at first glance. The seed material of this plant does not need preliminary preparation and remains high germination for 4-5 years from the moment of collection. It is important to plant seeds on time in a loose, nutritious and non-acidic soil, provide them with a warm and sufficiently illuminated place, and also protect them at first from the bright rays of the sun and fresh air with a homemade "greenhouse" made of dense transparent material. Subject to regular moderate watering, gradual hardening and a correctly performed pick, by mid-May, the gardener will have strong, healthy and beautiful seedlings that can be successfully transplanted into a flower bed and admire the flowers in about a month.


