Content
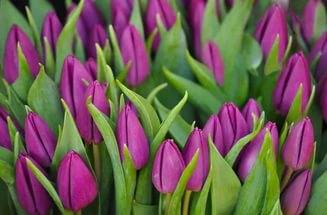
Every florist, no matter what kind of flowers he is cultivating: indoor or garden, knows perfectly well that every plant requires care and attention. And every minute spent comes back a hundredfold, delighting the owner of rare flowers with lush flowering. Therefore, they spare no time, no effort, and sometimes even money for the purchase of valuable varieties and caring for their favorites. And how sometimes it is a shame, having spent a considerable amount on the purchase of seed, not to see the desired beautiful flowers in the flower bed in the spring. And sometimes many blame the sellers, they say, they sold low-quality goods.
In fact, the reason may be much simpler - just failure to comply with the terms of digging, storing and planting bulbs. To avoid such unpleasant moments, it is important to know how to store tulip bulbs from the moment they are dug up to the moment they are planted. This process is not burdensome, and does not require financial costs. But the gratitude of the plants for their attention and the time spent will return to you with lush tender buds in early spring.
Why dig up tulip bulbs every year
Do you really need to dig up tulip bulbs every year? Many will tell you: "No." In fact, there is no single answer. And this circumstance depends only on the type of tulips.
Simple, garden flowers are transplanted every five or even seven years, believing that there is no need to waste time and effort, they bloom beautifully every autumn. Some varieties require more careful care and are very picky about the timing of digging and planting. And there are those that cannot be dug up and transplanted within two to three years. In any case, information about the terms and rules of storage will not be superfluous.
Here are just a few reasons why you should dig up tulip bulbs after flowering and put them in short storage:
- For a lush bloom in the spring, a certain storage regime must be created for tulip bulbs. At this moment, the foundation for the future flower is laid in them - a flower arrow is formed. Ripe bulbs should be stored strictly at a temperature of + 25˚C, no more, no less. Deep underground, the bulb does not receive the heat it needs.
-
All flowers of the bulbous family have one feature - every year they go into the ground to an ever greater depth. The deeper they go into the ground, the more difficult it is for weak and delicate shoots to break through the thickness of the earth in spring. Indeed, over time, this layer of land only increases. As a result, tulip bulbs will simply rot in the ground, not even leaving children for further reproduction. An empty flower bed is a rather sad sight. Especially in spring, when you really want to see the first colorful flowers.

- Earth. Even the most picky flowers take from the ground everything they need to grow and bloom. Therefore, over time, the soil becomes scarce, compacted and becomes unsuitable for plants.This circumstance affects the appearance of flowers, their resistance to diseases and the safety of varietal characteristics. In the process of digging and planting tubers, you can not only loosen the compacted soil, but also fertilize it with organic and inorganic additives, adding the necessary vitamins to the flower diet.
-
If you want to preserve the varietal characteristics of tulips, as well as get a large number of children from them, then digging tulips after flowering and planting them in the fall is simply necessary. After a couple of months after flowering, it will be difficult to select high-quality seed for subsequent plantings. And if the process of digging tulip bulbs is excluded, the children will become smaller. And collecting small bulbs will be very difficult.
- Humidity during storage is an important factor. For example, if tulips grow in a flower bed next to other flowers, you will inevitably water them. This can kill the tulip bulbs. Indeed, during a dormant period, moisture for them is tantamount to a death sentence. Not only do the bulbs begin to rot, they are affected by various diseases, passing them in the ground to each other. By timely digging and sorting the seed, you can avoid such consequences and rejoice in the spring looking at tulips that are ideal in shape and color.
- By not separating the extra small bulbs from the mature ones in the process of digging and sorting, you create an acute shortage of minerals and nutrients necessary for the normal growth and flowering of plants.

As you can see, there are many reasons for digging and properly storing tulip bulbs at the right time.
Why dig up tulips and how to do it right is described in the following video:
When to dig tulip bulbs
And when is this "right time"? Experienced growers are guided by the color and condition of the leaves. As soon as the tulip leaves begin to wither, you need to prepare for the digging process: prepare the container and storage room. And when the foliage has turned two-thirds yellow, it's time to dig up the bulbs. It was at this moment that the tulip bulbs are ripe, but the babies have not yet disappeared. Thus, in addition to the natural preservation of the bulbs, we also get excellent seed, which we have grown on our own. The approximate ideal time for digging and drying in central Russia is the period from the second decade of June to mid-July. In Siberia, the right time comes a little later - from the beginning to the end of July.
Due to the different climatic conditions in different regions, there is no exact date to start digging out these spring flowers. Avid florists pay great attention not only to the state of the foliage, but also to the belonging of tulips to a certain variety, the time of flowering and the characteristics of the climate.
Even a slight delay is fraught with the following consequences:
-
There is a high probability that the bulbs will simply rot in the ground or become infected due to excess moisture.
- Even in two weeks, the babies will grow up pretty well and separate from the main bulb. It will be very difficult to collect them, and the precious seed will be lost in the soil.
- A month and a half after flowering, the tulip bulbs begin to go deeper. At this time, you can easily damage them or, at all, not find them.
- All insects are known to be active in late spring and early summer. Actively multiplying, they pose a great danger to tulips. For example, beetle larvae are very fond of bulbs, but as food, causing irreparable harm to flowers.

Digging up too early does not bode well either. The bulbs will not have time to ripen and the flowers next year are likely to be small and weak.
If you are a happy owner of rare, exclusive varieties, then you need to approach this process more scrupulously and not rely on Russian maybe.
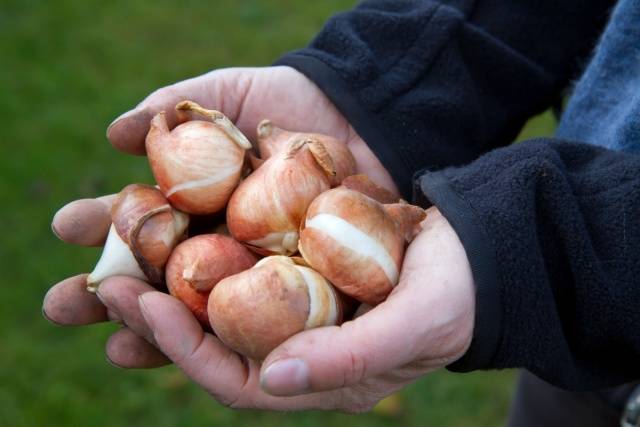
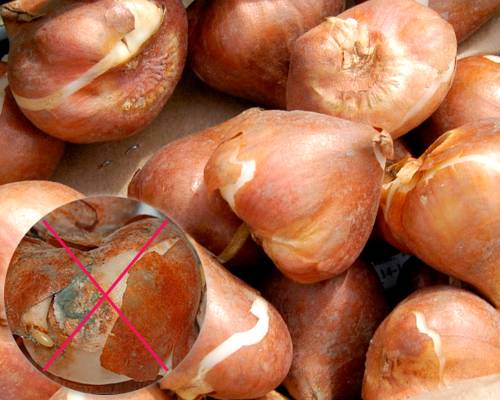
A ripe bulb dug out in time should have a golden brown cover scales.
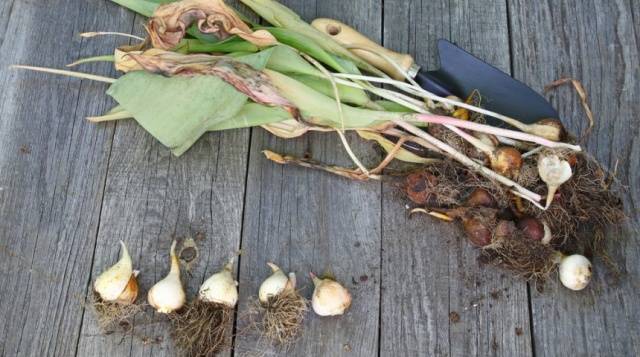
How to properly dig up tulip bulbs
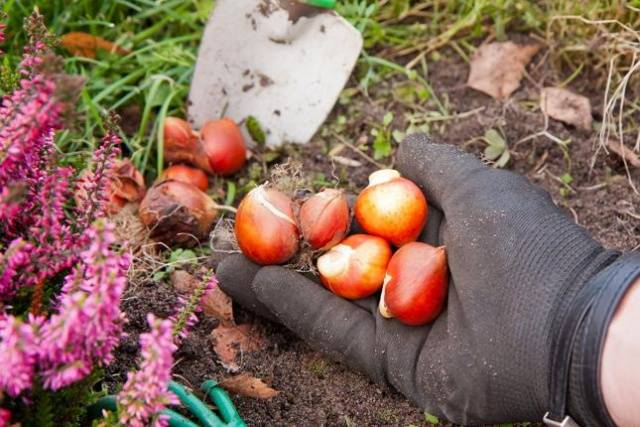
It is only necessary to dig up tulip bulbs in dry weather. It is desirable that the soil is also dry and crumbly.
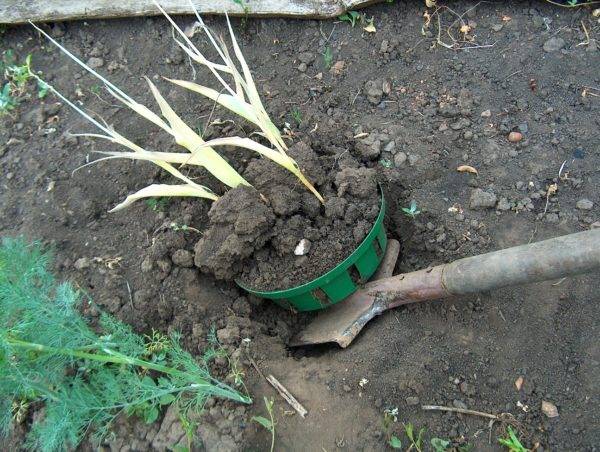
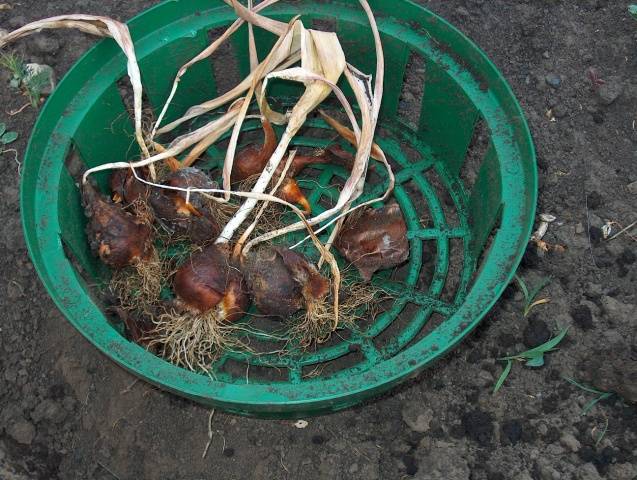
If you have grown tulips in trellis baskets designed specifically for planting bulbs, then the digging process will take place effortlessly. It is enough to dig a basket out of the ground, shake off excess soil.
If the tulips were planted in a flower bed or flower arrangements, then the digging process should be approached more carefully. In order not to damage the bulbs, you need to dig them out exclusively with a pitchfork, retreating 15 - 20 cm from the ground part of the plant. Then you will definitely not damage the bulbs.
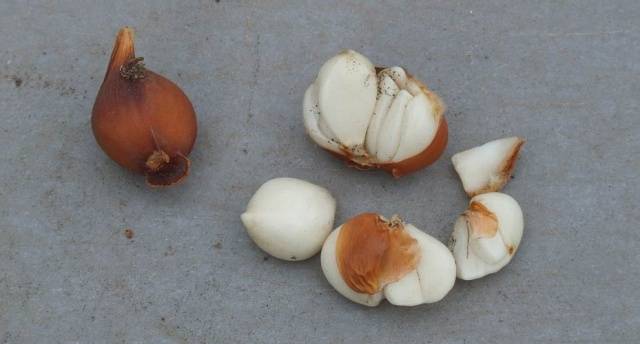
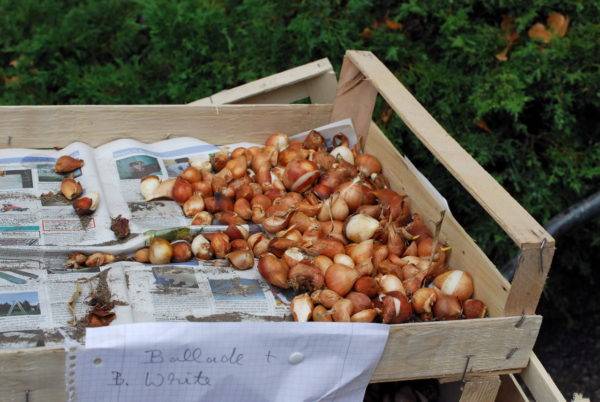
From the dug out plants, you must carefully shake off the rest of the soil. Sort the bulbs carefully by type, size and appearance. The following seed should be removed:
- sick or injured;
- too small seed (less than 1 cm in diameter);
- with traces of rot or mold.
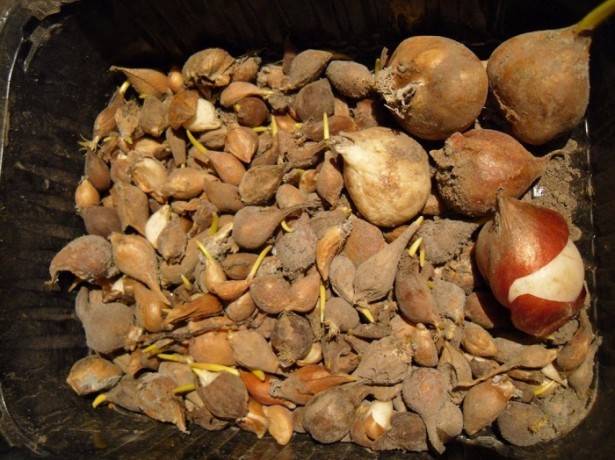
It is not recommended to trim the ground part of tulips immediately after digging. It is best to do this after the bulbs are dry.
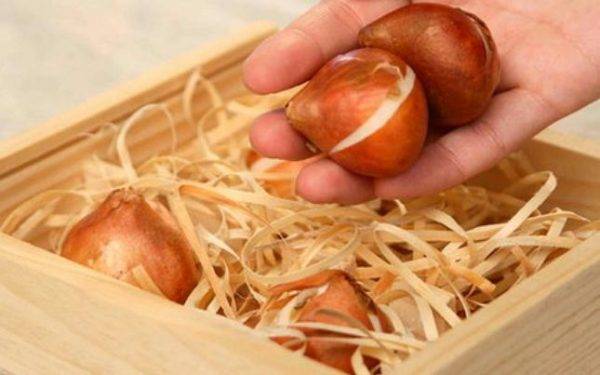
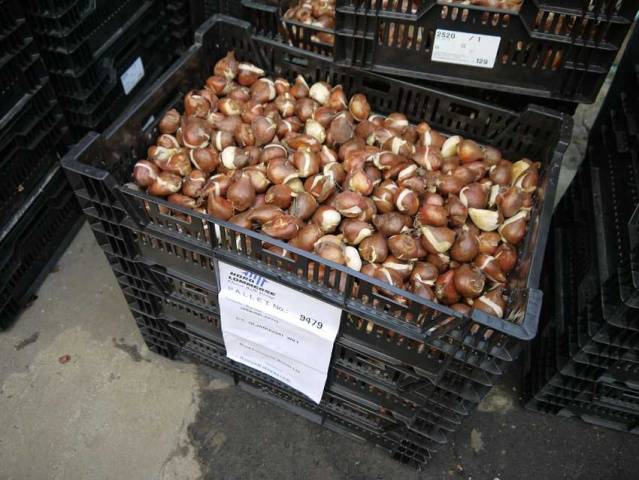
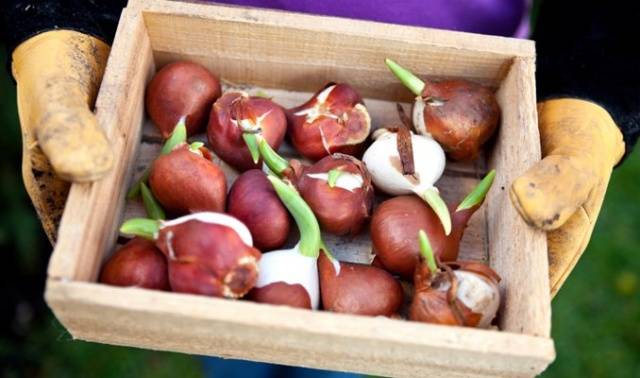
Arrange tulip bulbs in a single layer in a drying container. Plastic fruit crates are ideal for this. They provide sufficient air access.
It is necessary to dry the seed in dry weather from 2 to 5 days, with high humidity this period can last up to two weeks. The most important thing is to choose the right place to dry your tulip bulbs. It is important to place the container with the bulbs in the shade, excluding the possibility of direct sunlight.
What to do with tulip bulbs immediately after drying
After the tulip bulbs are completely dry, you need to prepare them for storage until planting in the fall. At this stage, you should pay special attention to the appearance of the seed.
- Trim the ground part of the plant, but not too close to the bulb itself.
- The easily detached cover scales should be removed. You do not need to forcefully remove them from the bulbs.
-
Soak tulip bulbs in a weak solution of potassium permanganate (light pink solution of potassium permanganate) for 30 minutes to disinfect the seed. If desired, you can use specialized preparations for the treatment of bulbous. The fungicide "Maxim" has proved itself to be excellent. It will help both preserve the bulbs and protect them from fungi and diseases.
- Examine the bulbs carefully again, discarding unstable material. Perhaps, when the bulbs were dirty, you did not notice any scratches or wormholes.
- Calibrate the seed carefully by size and type.
Dry the bulbs and now they can be placed in a container prepared in advance for storage.
Storage container
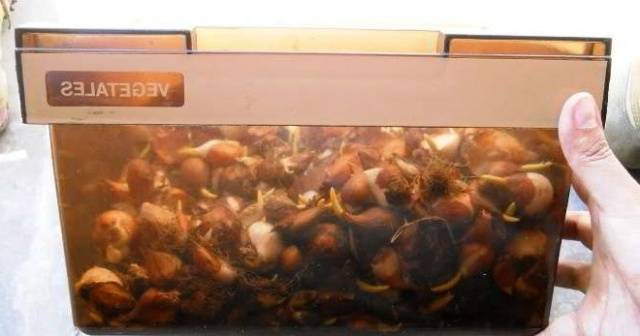
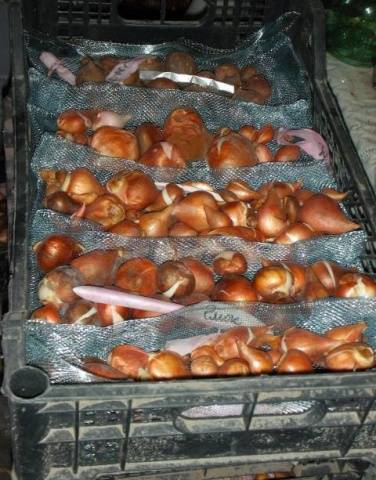
For long-term storage of tulip bulbs at home, the container must be selected in accordance with the size and source material. It is important that the bulbs have free access to air during the entire storage period. Plastic fruit boxes, wooden boxes 10-12 cm high are ideal for this occasion.
They need to put the bulbs in one layer.It is advisable that the tulip bulbs do not touch each other. You can shift them with dry sawdust or shavings. This material will protect the precious seed from rotting, absorbing excess moisture.
It is strictly forbidden to store tulip bulbs at home in cardboard boxes, plastic and metal buckets and basins, plastic bags. Cardboard is an excellent medium for the development of pathogenic bacteria, and in a closed container, the bulbs will quickly become damp and begin to rot.
Storage room
Care must be taken in choosing the storage space for bulbs prior to planting in the fall. Indeed, for these delicate spring flowers during storage, the indicators of humidity and ambient temperature are very important. Having created a favorable microclimate for the bulbs, you can be 100% sure that after a certain time you will get excellent material for planting tulips from storage.
Storage requirements:
- The storage area should be dark. It is important to exclude even short-term exposure to sunlight.
- The ability to check and regulate temperature and humidity. For varietal tulips, these parameters are of exceptional importance. Sometimes a temperature deviation of only 3 ° C or 4 ° C in one direction or another threatens not only the degeneration of the varietal affiliation, but also the absence of flowers in the spring flower bed.
- Lack of rodents that can cause irreparable damage to the bulbs. If a basement is chosen for storing bulbs until spring, you can pre-process it, excluding any possibility of pests entering.
In a private house, the basement, shed or attic are considered the best storage rooms for bulbs at home. In an apartment, unfortunately, it is more difficult to choose the ideal place for preserving the bulbs. But even here flower lovers find a way out by laying boxes with bulbs under the bed, or on the balcony.
There are, of course, special heat chambers to help preserve the seed. The microclimate in them is saved automatically, it is only necessary to set the parameters correctly on the display. But such devices are not affordable for every florist.
There is an opinion that bulbs can be perfectly stored in a regular refrigerator, on the bottom shelf. Such a place is completely unsuitable for storing seed. According to the storage rules, for the first two months, the bulbs must be provided with an elevated temperature (+ 25˚C, + 15˚C). At home in refrigerators there is no way to create appropriate conditions and gradually reduce the temperature. Therefore, you should not experiment, but it is better to make an effort and find another place for storage.
Storage microclimate
An important condition for the safety of the seed is the provision of temperature and humidity in the storage. These factors affect not only the preservation of the bulbs before planting, but also the flowering and retention of varietal traits. For example, if the temperature is too high or the humidity is insufficient, the bulbs will dry out.
But with high humidity, there is a risk of the development and spread of fungal diseases. There is also a risk that the bulbs will start to germinate prematurely. And in fact, and in another case, all the seed will inevitably die. Therefore, the creation of the microclimate of the room for storing tulip bulbs in both summer and winter should be approached with great care.
In the first month of storage, the bulbs should be stored at a temperature of + 24˚C + 25˚C. However, in August the temperature should be reduced by 5 ° C, and in September - by another 5 ° C. Thus, by the autumn planting, the seed should be stored at + 15˚С.
Indoor humidity should be maintained at 65 - 70%.The bulbs are immediately signaled of insufficient moisture: they will become soft and begin to lose elasticity. Therefore, as soon as you notice that the humidity is low, you can put a small container with water indoors or near the container with the seed.
Under these conditions, you will keep all the bulbs intact until autumn planting. If you carried out all the procedures in accordance with the above rules, then before planting you will see the results of your labors - the bulb should be dry, clean and without the slightest signs of germination.
You will see how to create ideal storage conditions for your bulbs in the following video:
Checking the seed regularly
The fact that you put your tulip bulbs in storage until the fall does not mean that they no longer need any maintenance. On the contrary, it is necessary to regularly, at least once a week, check the microclimate of the storage facility and conduct a cursory analysis of the seed at least once a month. Bulbs showing signs of disease or rot spots must be removed from the container immediately. They are subject to destruction. This procedure is done in order to prevent the spread of the disease and universal infection of all tulip bulbs. This check does not take much time, but the result will only be positive.
Processing after storage
Despite the fact that you carefully sorted and processed all the seed material in the summer and regularly monitored its safety until the fall, it is still worth duplicating a couple of steps before planting the bulbs. It is necessary to carry out a decisive calibration and re-disinfection from rot and fungus of tulip bulbs before planting in the ground. These works will not take so much time, but you will be sure that you did everything right. And the result of your actions will be a violent flowering of tulips on the site.
In what conditions to store tulip bulbs until spring
At times, the surrounding reality dictates its conditions to us. If the seed was purchased too late, or it is not possible to plant the tulip bulbs on time in due time, then you can save them until spring.
But at the same time, several rules must be observed.
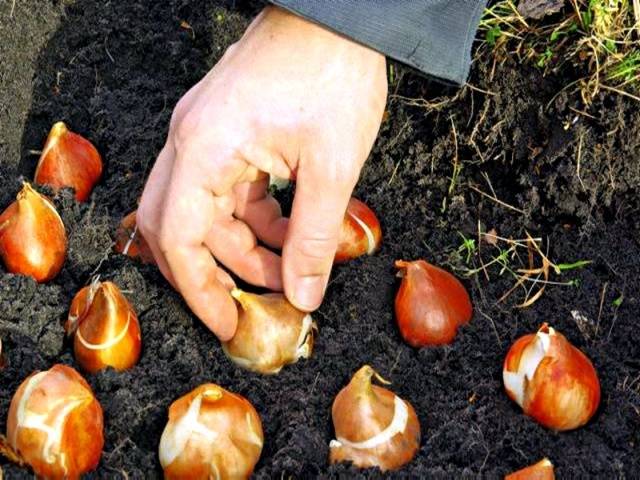
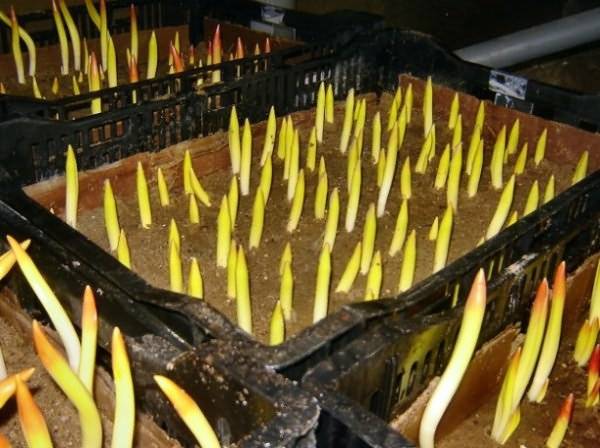
- In autumn, plant the bulbs in boxes with soil. Prepare the soil for bulbous plants in advance. The height of the soil must be at least 40 cm. The distance between the bulbs is 5 cm.
- Lower the boxes with the planted tulip bulbs into the basement. It should be noted that the air temperature in the basement should be 3˚C - 5˚C, no more. At elevated temperatures, the bulbs will germinate too quickly, at low temperatures, they will freeze.
- Once a week, take a quick look at your future flowers. If the soil in the boxes is too dry, moisten it slightly. In no case should you fill in the plantings - the bulbs will simply rot.
- In late February - early March, the first shoots should appear.
- With the onset of spring, the boxes with the sprouted bulbs should be taken outside, and in a few weeks you will be able to admire the first spring flowers.
Over the winter, the bulbs have rooted well, and the slightest violation of the root system will lead to catastrophic results: if there is a good and developed aerial part of the plant in early spring, you will not see flowers this year.
Preserving tulip bulbs in winter is troublesome, and therefore experienced growers advise to take care of the seed in advance, that is, in summer and early autumn. It is necessary to plant the bulbs strictly in the autumn so that the tulips bloom profusely in the spring. In a later period, it is better not to buy seed and not plan planting work.
Subject to the above rules for digging and drying, as well as the storage conditions of tulip bulbs, you can not only admire the bright colors of the coming spring, but also be rightfully proud of the beautiful flowers grown by your own hands.


