Content
The windowsill is the best place to grow seedlings, but it can hold few boxes. The shelves allow you to expand the space. The manufacturing process of the structure is no different from the assembly of stationary racks, only other dimensions are calculated. It is customary to equip three shelves for seedlings on the windowsill due to the limitation of the height of the window opening. The distance between the tiers is from 40 to 60 cm.
Steel structure
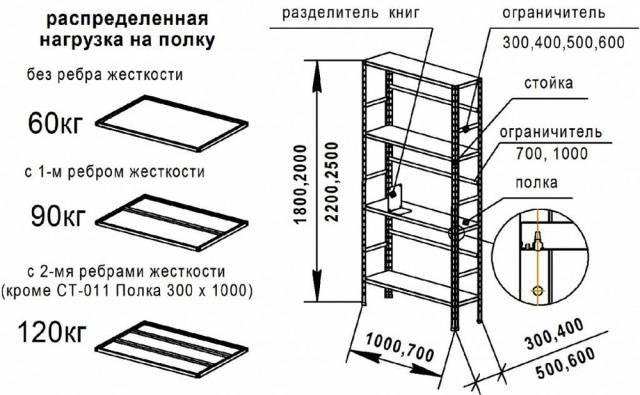
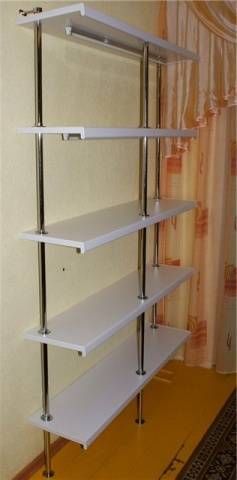
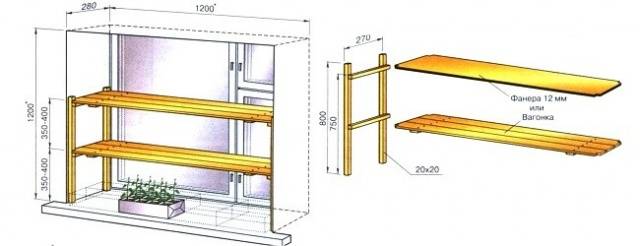
Metal shelf for seedlings suitable for a window, subject to the availability of a wooden window sill. The design will be heavy, plus the weight of the boxes with soil and seedlings. The plastic window sill may have dents. A diagram of a structure with shelves is shown in the photo. For example, a metal bookcase is taken, which differs only in size. The width according to the scheme can be left, and the height can be calculated according to your window opening.
Steel shelves for seedlings are made collapsible with a bolted connection or welded into a single structure. Although, in the second version, only the frame is solid. The shelves themselves can be easily removed from the crossbars. For the frame, a profile with a section of 20x20 mm and a corner with a side width of 25 mm are used. Shelves are cut from chipboard, plywood, or other similar boards. The exact amount of materials depends on the size of the structure, which is usually adjusted to the dimensions of the window opening.
Let's look at how to make shelves for seedlings on a windowsill from steel blanks:
- The dimensions of the structure are calculated so that a gap of 50 mm remains between the frame, the side walls of the window opening and the glass. It will not be possible to place more than three shelves on top of the window sill. On average, the height of the tier will be 500 mm.
- Two rectangles are collected from the profile. These will be the side members of the frame. Having stepped back from the bottom and top of 100 mm, the jumpers are attached. The elements will act as stiffeners that reinforce the rectangular frames.
- The rectangles are placed in a vertical position, the lower and upper corners are connected with jumpers.
- The frame is ready. Now it remains to equip it with shelf holders. It is better not to weld them, but to make them with a bolted connection. This will allow you to change the height of the shelves in the future. To fix the holders at the side racks of the frame, holes are drilled.
- The holders themselves are made from a steel corner. The workpieces are cut to a length corresponding to the width of the frame. Holes are drilled at the ends of the corners. Here it is important to observe the coincidence of the holes on the holders and frame posts.
- The drilled corners are bolted to the side posts of the frame.
It is advisable to paint the metal rack for aesthetics and protection against corrosion. The shelves are cut out to a size corresponding to the frame and placed on holders from the corners.
Shelves on a frame made of PVC pipes
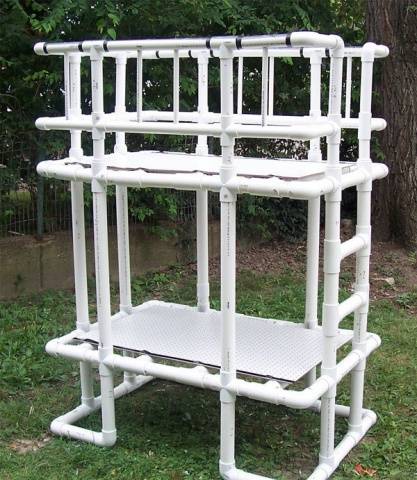
A beautiful shelf for seedlings on the window with your own hands will turn out from PVC pipes. The skeleton assembly resembles a constructor. In addition to pipes, you will need fittings: tees, crosses and elbows. The connection method depends on the type of material used. PVC water pipes are joined by soldering, glue or detachable fittings. The last option is more convenient. After growing seedlings, shelves with a frame can be disassembled for storage into small parts.
The assembly of the frame similarly begins with two side posts in the shape of a rectangle.They are connected to each other by a bypass line of pipes and crosses at the height of each future shelf. Basically, you get two vertical rectangles connected by three horizontal rectangles. If the pipe is too thin, it is better to reinforce the frame with additional bypass lines under the lower and above the upper flange. This will make five horizontal rectangles.
Rigid jumpers are needed for the shelves. When assembling horizontal rectangles, tees are installed. They are attached to opposite pipes so that the central holes are opposite each other. Jumpers are cut from pieces of pipe and inserted into the holes of the tees.
Shelves for shelving are cut from the same plywood or chipboard. The frame made of PVC pipes is beautiful. For aesthetics, tempered glass sheets can be laid. Such a shelf for seedlings will effectively fit on a plastic window, and due to its light weight, it will not create much pressure on the window sill.
Wooden frame with height-adjustable shelf
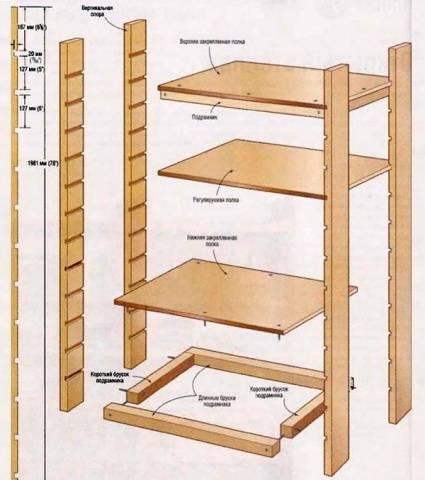
A wooden shelf for seedlings on the windowsill with your own hands is the most common option. The material is lightweight, inexpensive and easy to process. To make a rack with one height adjustable shelf, you will need 4 racks made of a 40-50 mm thick board. On one side, the grooves are cut with a pitch of 50–100 mm. The cutting width is a couple of millimeters greater than the thickness of the material for the shelf.
The frame is assembled so that the slots are inside the structure. The boards form corner posts, and from above and below they are connected by strapping from a bar with a section of 40x40 mm. The resulting rectangular subframes will form the basis for the stationary bottom and top shelf. The intermediate third shelf is freely inserted into the slots of the desired height.
Wooden frame from a bar
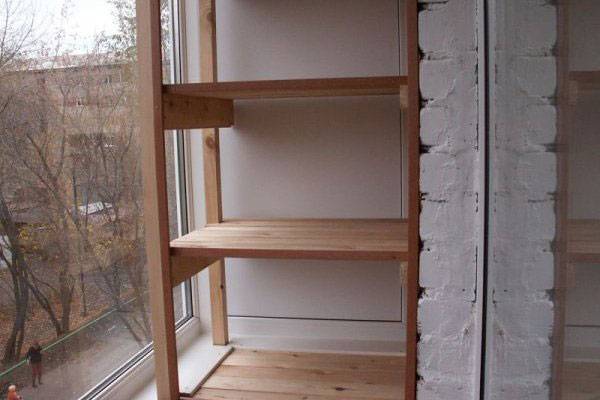
It makes no sense to consider in detail how to make shelves for seedlings with your own hands and fix them on a frame made of wooden beams. The assembly technology is similar to the manufacture of metal structures.
First, two rectangles are assembled from a bar - the side racks of the frame. The elements are connected to each other with jumpers of the upper and lower strapping. Crossbars are installed inside the side rectangles. These will be the shelf holders. The assembly of all elements is carried out with self-tapping screws. The shelves themselves can be made not only from a plate, but also collapsible, using pieces of a thin board.
Two options for shelves made of plastic boxes
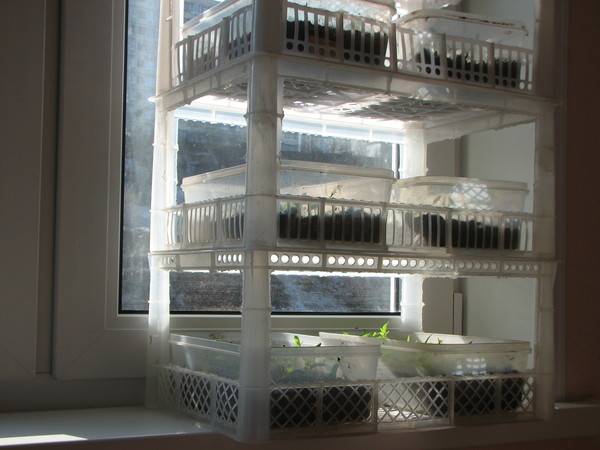
Depending on the crops grown, seedlings can be large or small. Shelves for low plants can be made from plastic boxes stacked on top of each other. But first, the containers need to be prepared. With a sharp knife, cut off most of the side walls of the boxes. A low side should remain. The corner legs are left intact. Prepared containers are stacked on top of each other to make a rack with shelves.
The solution to the question of how to make a backlit seedling shelf is to use LED or fluorescent lamps. The light sources are fixed to the bottom of the box next in height to the tier.
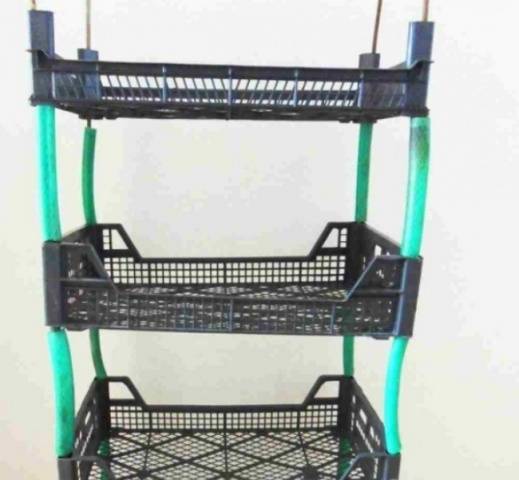
For tall seedlings, the distance between the shelves is increased. Plastic boxes are prepared using a similar technology. To lengthen the racks, pieces of a metal rod are cut. The rods are inserted into the grooves of the drawer legs. A piece of hose is put on each rod. These will be restraints that prevent the upper tier container from settling. The rod should protrude from under the hose. When the next box is placed on top of the pins, its legs will rest on the stopper.
Beautiful stand made of plastic windowsills
Do-it-yourself beautiful shelves for seedlings on the window will be obtained from plastic window sills.The workpieces are sawn off with a length of 5 cm less than the width of the window opening. The side ends are closed with plastic plugs. In the center of the window sill near the front bend and in the far corners, holes are drilled for the racks. This can be done easily with a drill with a nozzle. A console is fixed in each hole with self-tapping screws, pipes are inserted and clamped.
A beautiful structure of shelves on three legs is equipped with lighting. On the back of each window sill, a tubular fluorescent lamp is fixed or an LED strip is glued.
Temporary Shelf Making Ideas
Usually, temporary shelves on the windows are needed for seedlings, which, after planting the plants, can be easily disassembled. Not a bad idea is based on the manufacture of two side racks with ladder jumpers. The structures are placed close to the side walls of the window opening. Shelves are laid on the lintels. Better to make shields from a thin board. Bars are nailed from below on both edges of the shelf. They will rest against the ladder jumpers, preventing the sidewalls from falling.
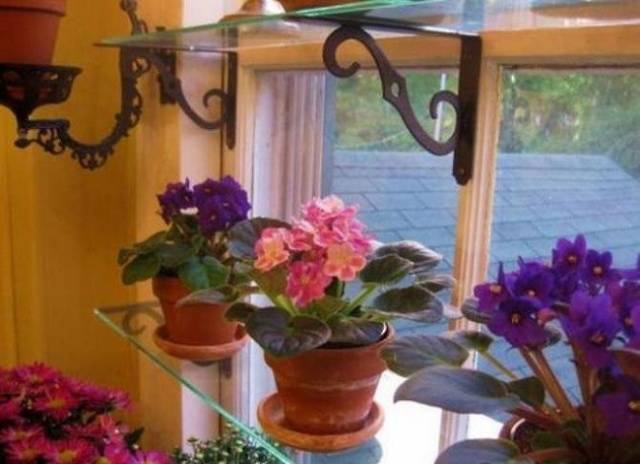
Temporary shelves for seedlings on a wooden window can be made of tempered glass. L-shaped curly brackets are screwed along the edges and to the middle of the frame with self-tapping screws. Glass shelves are removed from old furniture and placed on fixed holders. Neon lights will not only benefit the seedlings, but also become a real window decoration.
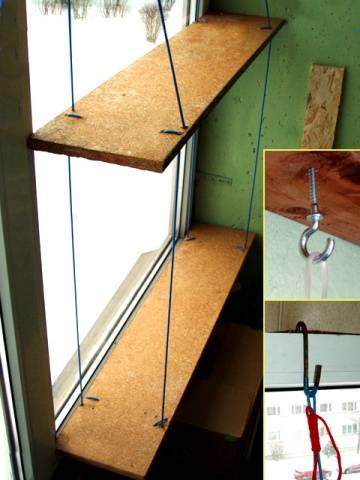
A very simple option is hanging the shelves with ropes. In the design, it is important to ensure reliable fastening of the brackets. For shelves, edged board, chipboard or old plastic window sills are suitable. Holes are drilled in the blanks, stepping back 10 cm from the side edges. Two brackets are fixed in the upper part of the window opening. A rope is threaded through each hole in the shelf, a fixing loop is made, after which the finished structure is hung on hooks.
The video shows an example of making a shelf:
After completing the assembly of the rack, the question remains how to equip the shelves on the seedling window so that they benefit the plants to the maximum. The answer is simple. It is necessary to combine artificial and natural lighting. The shelves are equipped with lighting from lamps, and foil reflectors are placed on the sides and opposite the window.


