Content
You can get a good harvest only by observing the technology of growing crops. For example, a blackberry trellis is a necessary construction. The support helps to form the plant correctly, to tie the whips. Young shoots are woven along the trellis. There are even special rotary structures that allow you not to remove the whips during laying for shelter for the winter.
Why is blackberry support useful?
Before proceeding with an overview of the types of supports, it should be noted that growing blackberries on a trellis has many advantages:
- raised whips are not smeared on the ground during rain or watering;
- berries remain clean, are not eaten by pests crawling on the ground;
- good ventilation of plants on a large plantation reduces the risk of fungal infection;
- uniform penetration of sunlight helps to accelerate the ripening of berries throughout the plant.
In addition, supports for blackberries benefit the person himself:
- a tied plant is easier to care for;
- when trimming old lashes, young shoots are not injured, since they are not intertwined;
- plantings are easier to water, the possibility of mulching the soil is provided;
- it is easier to harvest at a height;
- in the fall, the plant is easier to prepare for wintering.
If the question arises whether it is necessary to tie up a blackberry, the answer is unequivocal - yes.
What is a trellis for a blackberry: photo, description of the design
If a do-it-yourself trellis for a blackberry is made, special drawings are not needed. The structure of the supports is simple and is divided into two main types:
- The single-strip model is more commonly used on small plantations. Usually such a trellis for blackberries is made with their own hands by amateur gardeners and summer residents.
- The two-lane model is in demand by large farmers growing crops on large plantations.
Each type of support has its own supporters and opponents.
Single-strip model
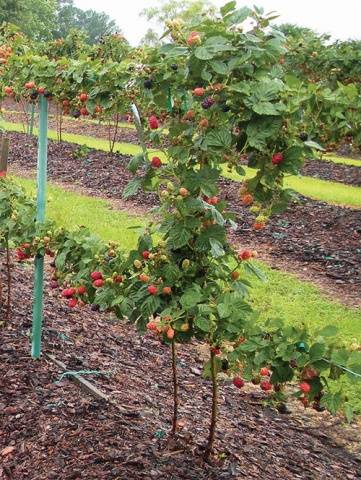
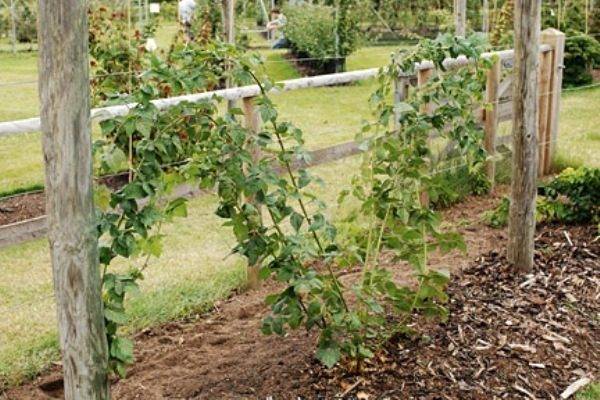
The simplest design consists of dug-in pillars with a wire stretched between them. Usually the height of the trellis for blackberries is made in the height of a person. In addition to the vertical state, the support is placed at a slope, equipped with a fan, free form, and even horizontally. The choice of position depends on the place of growth, since the plant is still grown to decorate the site.
Two-way model
The structure consists of the same pillars with wire, only the supports are arranged in two rows. The trellis simplifies the garter of the lashes, the formation of the plant, the bushes do not thicken. Two-lane models are in demand by farmers with large plantations. By design, the trellises are of three types, made in the form of letters: "T", "V", "Y".
The blackberry support looks like this in the photo:
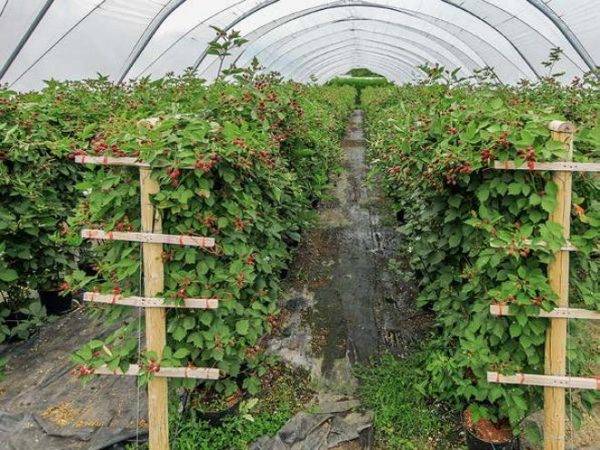
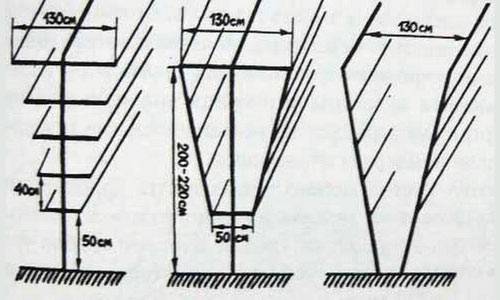
- Tapestry in the shape of the letter "T" consists of vertical pillars to which horizontal elements are fixed at an equal distance. A wire is fixed to their edges, forming two lines for tying whips near one row of supports. There are no secrets on how to tie a blackberry correctly on such a trellis. The lashes are simply straightened along the opposite lines of the wire. The center of the row is empty.

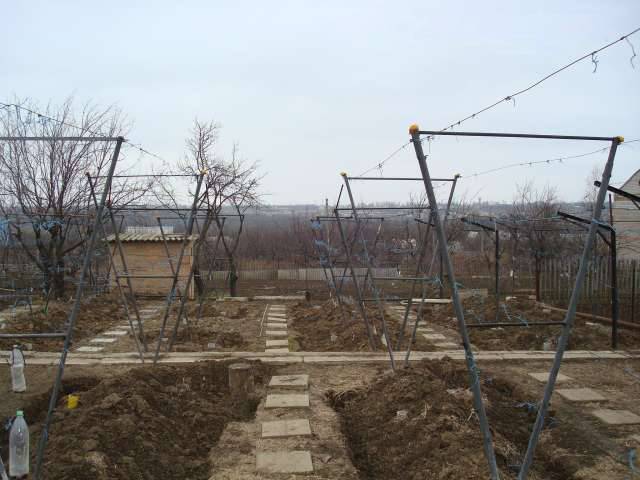
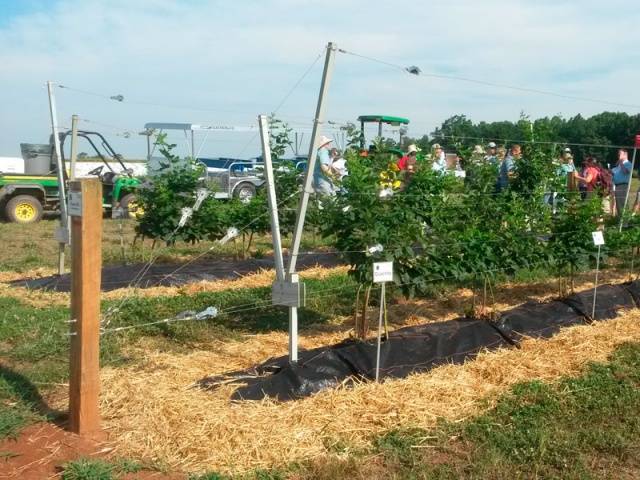
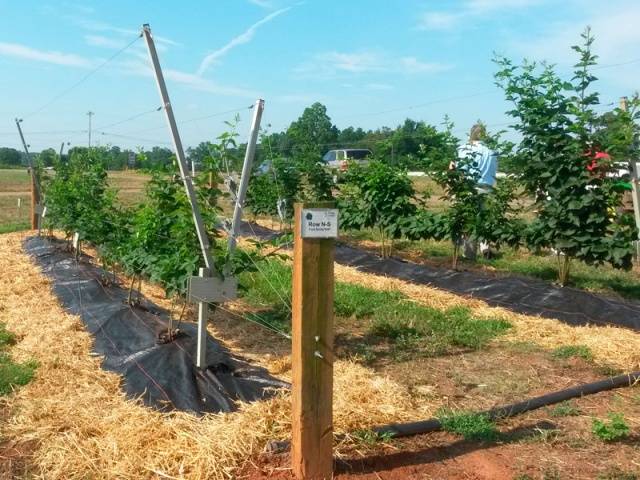
- V-shaped tapestry consists of paired supports installed at a slope. One element has two pillars that connect at the ground and expand at the top. The blackberry garter is carried out on the trellis in the same way as on the support in the shape of the letter "T".
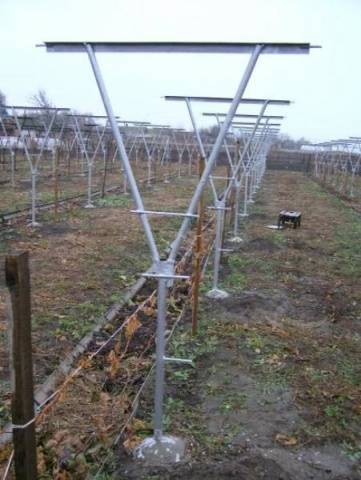
- Similar to the previous version, trellises look like blackberries in the shape of the letter "Y"... The difference is the expansion of the two pillars not near the ground, but approximately from the center of the main support. Such trellises are often made pivoting on hinges. If the question of how to tie a blackberry beautifully is being considered, then such a design is ideal. From the bottom, before the expansion begins, you will get a smooth wall of stems. From the center of the support, the lashes will begin to go to the side, forming a beautiful vase with berries.
Any do-it-yourself blackberry support is made from wooden poles, metal pipes or a profile.
Making a trellis for blackberries with your own hands: photo, drawing
If you wish, you can buy a trellis for a blackberry, but why spend a lot of money if the structure is easy to assemble yourself. The photo shows a drawing of supports in the form of the letters "T", "Y", "V". However, for a summer residence or a small home area, you can simply limit yourself to a single-lane trellis.
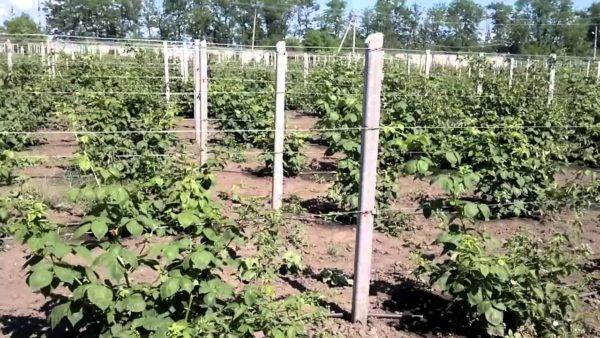
This photo shows a do-it-yourself single-row support for blackberries, which the owner is able to build from improvised means. The pillars are the basis of the construction. You will need wooden poles or metal pipes 2.5 m long. It is better to use wire to stretch the lines. As a last resort, twine will do.
A do-it-yourself blackberry stand is made as follows:
- In the row where blackberries will grow or have already been planted, dig holes under the pillars 80 cm deep. The holes can simply be drilled with a drill. The distance between the holes is maintained up to 5 m.
- A layer of crushed stone or gravel 10–15 cm thick is poured into each hole. The pillow will prevent subsidence of the supports.
- The bottom of each pillar is treated with bituminous mastic. Supports are installed in the hole, leveled, covered with earth. The height of the trellis will be approximately human height - 1.7 m. As the soil is backfilled, it is tamped with a shovel handle. It is undesirable to concreting trellis posts for blackberries. If the plant disappears or is needed over time transplant to another place, the supports will be difficult to dismantle.
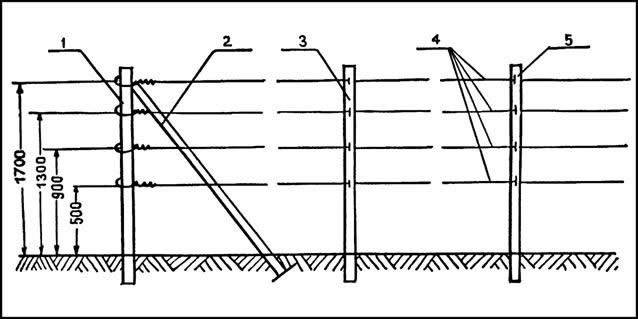
- The end of making a trellis for a blackberry is to stretch the lines from a wire. Usually 3-4 tiers are made. The first wire is pulled over the top of the posts. Subsequent lines go down in 50 cm increments. It is easier to pull the wire into the through holes drilled on the posts. At the extreme supports, it is advisable to install a line tensioning mechanism, for example, from bolts.
The posts of a properly made trellis should not tilt when stretching the wire or under the weight of growing blackberries.
More details on the video do-it-yourself blackberry trellis:
Planting blackberries when growing on a trellis
Before you figure out how to properly tie a prickly blackberry, you need to figure out the planting pattern. It takes into account the peculiarity of the variety, climatic conditions, the nutritional value of the soil. The better the performance, the larger the bush grows.
The usual shaping of blackberries on a trellis is done in a fan-like fashion. This scheme is suitable for a variety with limited lash growth. Bushes are planted in one row in 2–2.5 m increments. Row spacings are made of a similar size. For bush varieties, the row spacing and the distance between plants are made less than 2 m.
Depending on the variety, a blackberry garter is performed in spring in three ways:
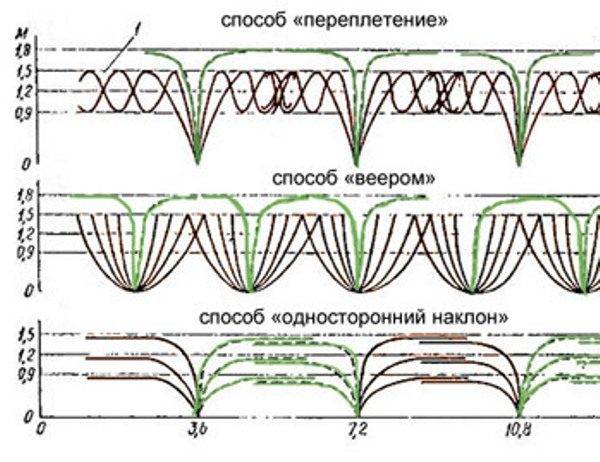
- Interlacing. The scourge of the plant is fixed to the trellis on three tiers. New branches that have grown are bent away from the trunk, bringing them to the fourth top line.
- By fan. Old blackberry lashes are straightened from the trunk in the form of a fan. Fixation occurs to three lines starting from the ground. It turns out the shape of a bush. The growing young lashes are allowed to drag along the upper fourth line.
- Unilateral tilt. The old branches of the blackberry are tilted to one side, fixing to three lines, starting from the ground.Young shoots are guided to drag along three lines of wire in the opposite direction.
In the fall, the blackberries growing on the trellis are cut off. Damaged and weak shoots are removed from the plant, as well as whips that bore fruit in summer. By the spring, only the young are left.
In the video, how to tie a blackberry correctly:
The latest development - a swivel trellis
The latest development of American scientists is a rotating trellis for blackberries, which allows growing crops in cold regions. The technology is gaining popularity among large producers around the world supplying berries for sale. Scientists have proven the uniqueness of the design, for which its own system of forming bushes has been developed, which makes it possible to obtain large yields annually.
The essence of the technology lies in the fact that already at -23aboutWith blackberries, fruit buds freeze. In cold regions, creeping varieties are easily laid on the ground, covered with straw mats until spring. A semi-cured blackberry variety cannot be bent to the ground. Lignified trunks and shoots break when removed from the trellis. It is very difficult to bend the whips. The swivel trellis allows you to lay the plant on the ground without removing the lashes from the wire. The design is simply transferred to the winter position by loosening the tension of the lines and turning the hinge. A simple laying process, even on a large plantation, can be done by two people.
Do-it-yourself swivel trellis for blackberries in the country is not very in demand. However, when growing a special favorite variety, you can try to build. The structure of the support itself is made in the shape of the letter "Y". The secret lies in fixing the upper fork of the posts to the main post. In this place there is a hinge with a lock. Single stationary pillars are installed as extreme ones in a row on both sides. Stretch braces are stretched to them, holding the supports.
The use of pivoting tapestries has its advantages:
- yield increases due to free weaving of shoots on the sides of the support;
- the opportunity to grow thermophilic varieties of blackberries in cold regions is provided;
- improved airing of the bush, penetration of sunlight;
- the risk of burning berries during the heat is reduced;
- simplified harvesting, laying bushes for the winter.
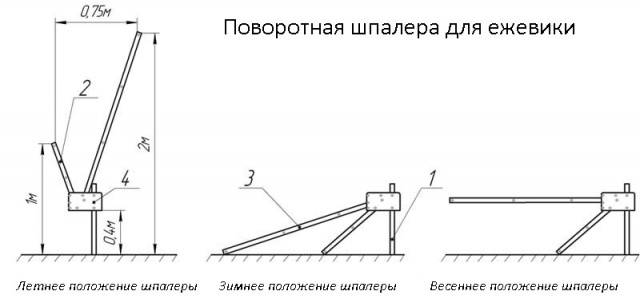
The pivot structure consists of a main strut, a short and long arm, and a hinge, which is often used as a metal bolted plate.
The support has three positions:
- Summer. This provision is considered basic - basic. The support is installed vertically. Fruiting blackberry lashes are fixed on the long shoulder. All new branches are directed to the short shoulder. These lashes will bear fruit next summer. The trellis is turned so that all fruiting branches are obtained from the side opposite to the sun to prevent burns of the berries. It is convenient to harvest, since the fruits are located on one side at the height of human growth.
- Winter. In this position, the support is placed on the ground. Young shoots are obtained inside the shelter, due to which the protection from the frosty wind is enhanced. Preparation begins in the fall. On the bushes, old branches are cut right at the base of the trunk and removed from the long shoulder. In their place, young branches are shifted, which in summer grew along a short shoulder. The support is turned to the ground. The laid blackberries are covered with straw mats or agrofibre.
- Spring. During this period, the kidneys begin to awaken. The support is raised so that the long arm with whips is horizontal to the ground. This position encourages the formation of berries on one outside of the trellis fork.
After the growth of small shoots, the structure is transferred to the basic summer position.
Conclusion
Growing blackberries and other weaving crops on a trellis is simplified. It is better to allocate a little money and time for the manufacture of poles than to regret the lost harvest later.


Great article! Everything is detailed and well described! I found for myself the best way to install a trellis for a blackberry. Thank you so much! Sincerely, Elena.